![]()
To upload the KYC document on the EPF UAN, follow the steps mentioned below:
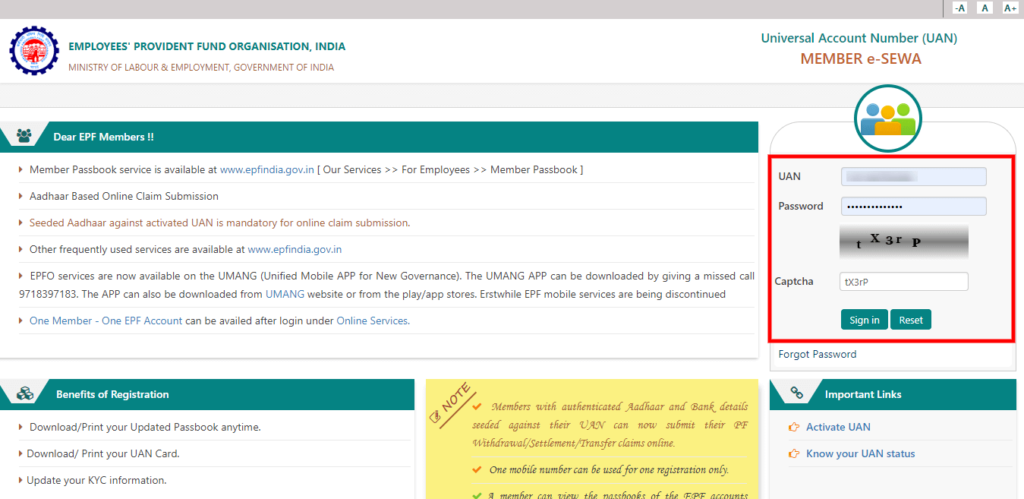
- Visit the EPFO’s member portal https://unifiedportal-mem.epfindia.gov.in/memberinterface/ Use your UAN and Password and fill up the Captcha to log in to the portal.
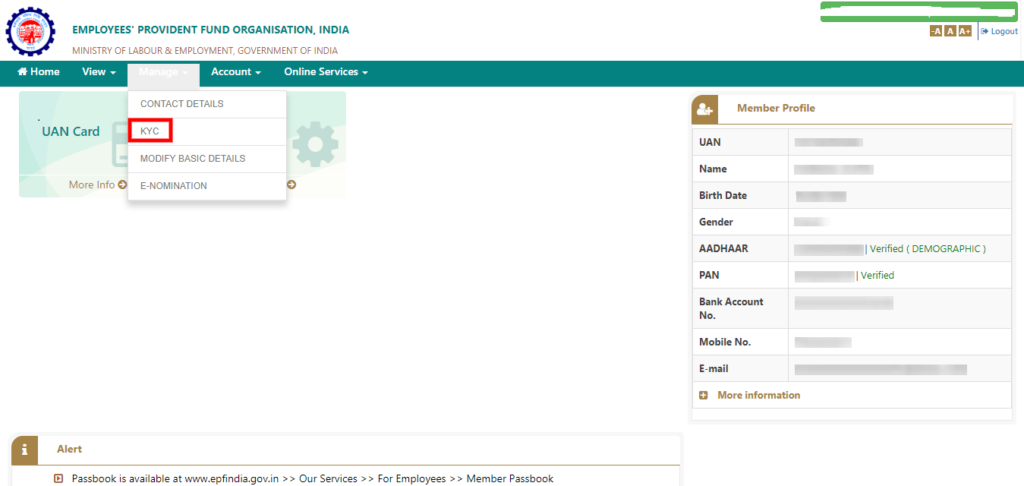
- After logging in to the portal, go to the “Manage” option from the top menu bar.
- Once you have clicked on that, select the “KYC” option from the drop-down menu.
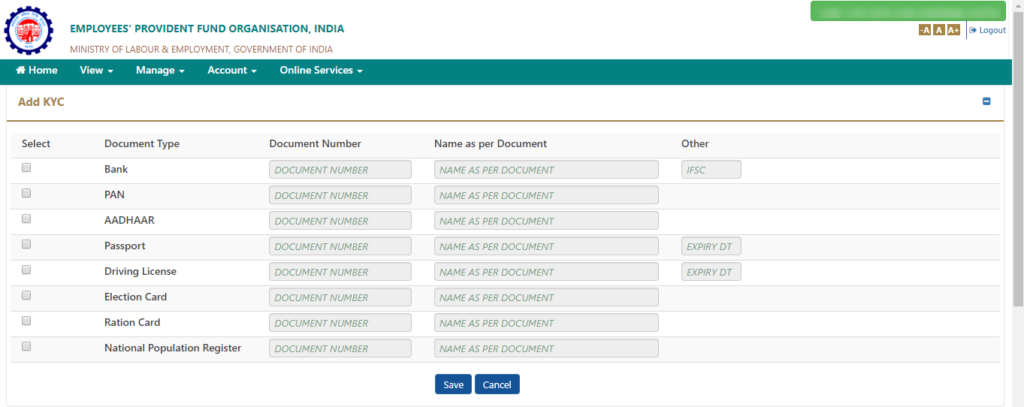
- After clicking on the “KYC” option, you will be redirected to a new page which will contain a list with different “Document Type” and respective fields next to them which are to be filled up with the details of the document.
- Click on the checkbox next to the document type that you want to update and fill in the “Document Number” and “Name as per Document” fields.
- Once you have updated the details click on the “Save” option.
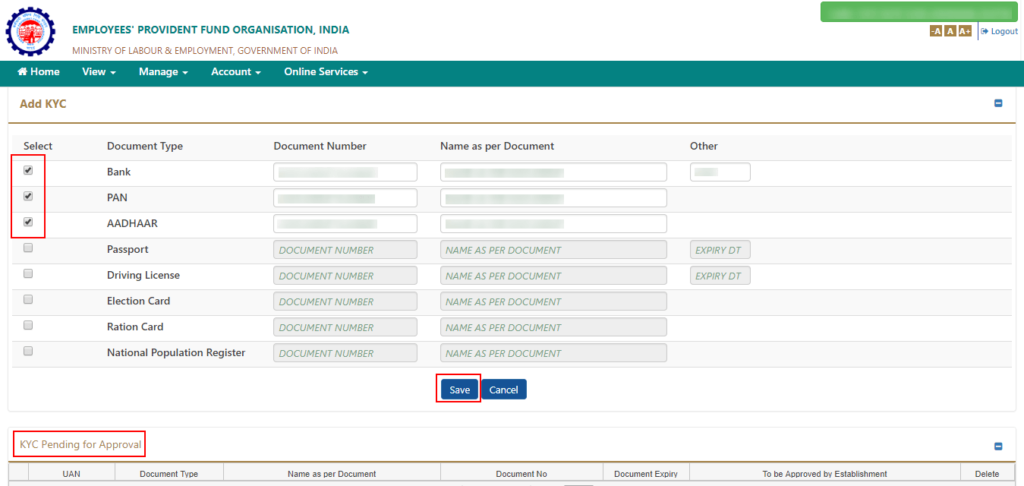
- Once you have updated the details of your document, the status of your KYC document will be shown under the “KYC Pending for Approval” column. Once your employer has verified the document and approved of it, the status will be shown under the “Digitally Approved KYC.”
- Once your employer has approved your document, you will receive an SMS confirming the same.
Key Points to Note:
- While filling the details of your KYC document, one has to make sure that there are no discrepancies with regard to the details that you have entered from your KYC documents such as Aadhaar card, PAN card and so on.
- After you have uploaded your document, the process of approval from your employer will take 2-3 days roughly.
- EPF member who have their KYC details embedded in the portal usually get their claims, withdrawals, transfers, etc., approved much faster and the process is simpler for both, the employee and the employer.
We are providing practical training (Labor Laws, Payroll, Salary Structure, PF-ESI Challan) and Labor Law, Payroll Consultant Service & more:
- HR-Generalist-Practical-Training: https://oneclik.in/hr-generalist-practical-training/ (PF, ESI, Bonus, Payroll & more)
- Labour Code | Labour Bill (Labour-Law-Practical-Training): https://oneclik.in/labour-law-practical-training/ (Factory, Contact Labor, Maternity Act & more)
- PF – ESI Consultant Service: https://oneclik.in/pf-esi-consultant-service/
- Labor Law, Compliance & HR – Payroll Management
- Advance Excel Practical Training
Get Latest HR, IR, Labor Law Updates, Case Studies & Regular Updates: (Join us on Social Media)
- Telegram Channel: “One Clik”
- Whatsapp Group: https://wa.me/919033016939
- Facebook: One Clik
- Linkedin: One Clik
- Instagram: oneclik_hr_management
- YouTube: One Clik